Why Creating a Studio Setup is Harder Than It Looks? Part 7... Space Limitations
May 17, 2026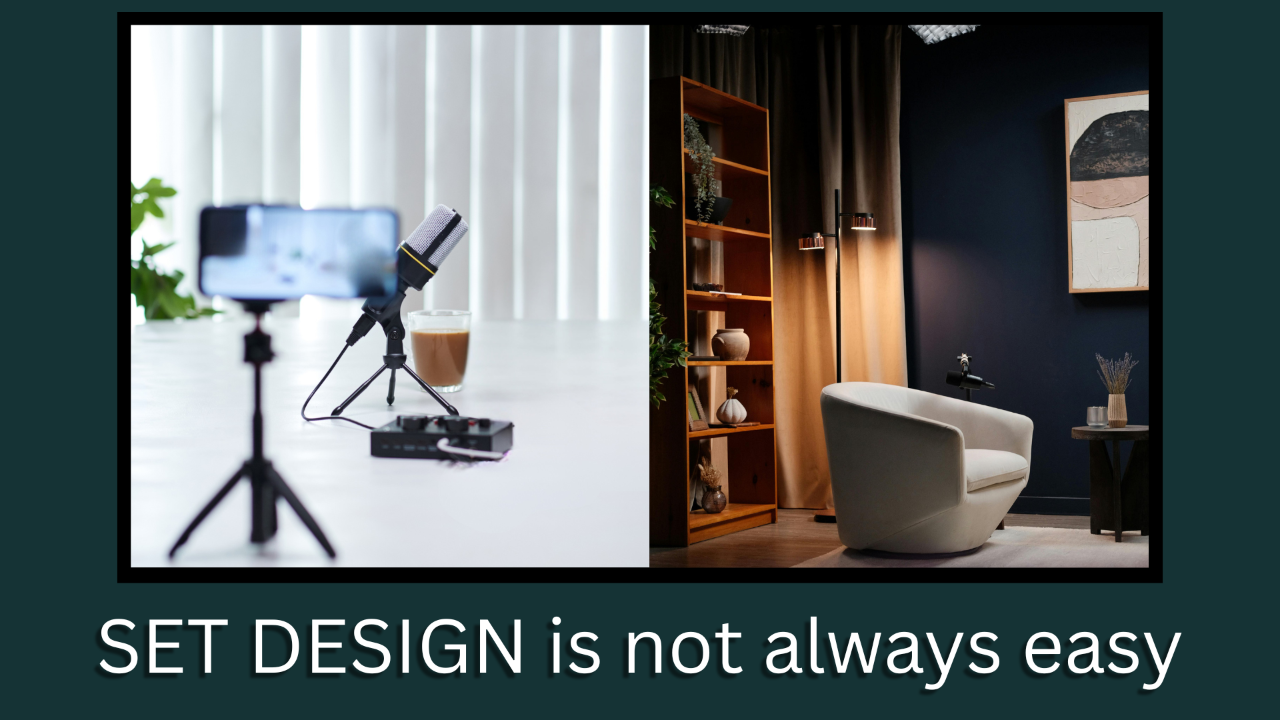
The short answer is…
You are not solving a design problem.
You are solving a communication problem visually.
Unless you are working within a professional studio space where sets can be huge and dedicated, you are limited by the space you have available, or the space you can make available to create your Live Streaming/Podcasting set and background.
With limited space you will have to deal with limited wall space, limited depth, wall colors, windows, low ceilings and lighting issues. BUT, there are ways to overcome these issues.
Remember, your “Studio Look” is just a highly controlled visual illusion contained within a narrow frame on your viewers screen.
Here are some steps to take when space is at a premium…
#1 Create "Perceived Depth”
In previous posts, when physical depth is an issue, creating perceived depth can be achieved by using…
– Set layering of the scene via fore ground, mid ground and background.
– Practical lighting, such as lamps or RGB accent lights behind you to aid in the background layering.
– Longer focal length lens or a tighter crop to compress and isolate the subject.
– Background blurring, (Bokeh), by using a wide aperture of f1.2 to f2.4 and subject distance from the actual background.
Your audience will read the layered separation as a “Professional Studio” even though your space may be very small and limited.
#2 Ceiling Height
Your low ceilings can immediately expose a room as a bedroom, basement, office or cubical.
The mistake most Content Creators and Business Professionals make is to decorate upward rather than treating the ceiling height with lighting control.
Here are a few ways to handle that…
– Keep lighting directional and intentionally focused. Control the spill light from every light source.
– Avoid upward lighting as the spill light on the ceiling is a dead giveaway.
– You can use grids, softboxes, flags, or any practical lamp shade to direct the light exactly where you want and need it.
– Framing your shot lower and tighter so the ceiling rarely if ever appears on camera to your viewer.
– Angle the camera up slightly, by placing the camera slightly below eye level and tilting it up slightly, this angle forces a perspective that makes the walls and ceiling appear taller than they are.
Remember, selectively lighting your space will hide your space limitations and can create background contrast that gives you a curated professional look rather than a “Webcam” look.
#3 Use Your Wall Color Strategically
Rented or shared spaces often lock a creator into some specific colors on their walls. Rather than fighting it here are a few workarounds…
– Use colored RGB accent lights to neutralize an odd colored wall or add depth to a plain one.
– Wall Hangings, use acoustic panels, curtains, wood slates, shelves or fabric such as moving blankets or blackout curtains to treat the walls.
– Using negative fill, such as dark fabrics or lighting flags to add contrast and thereby hiding the odd colored wall.
Remember… The camera only sees what is inside the framed shot. You are designing a scene, not renovating the room.
#4 Widow Placement
Windows can be a challenge when they are in a not so complimentary location in your space. They can cause exposure shifts, glare or inconsistent color temperatures. But they can be an asset when treated correctly even if they are visible in frame.
– Diffuse harsh daylight with sheer curtains or diffusion fabric.
– Use blackout curtains and fully control your lighting when consistency matters more than natural light.
– Whenever possible, never place the window directly behind the subject.
– Match any fill lights to the color temperature of the window lighting.
Remember in tight or confined spaces where the window cannot be treated and used, hiding it with a wall hanging is always an option.
#5 Design for the Camera Frame
Rarely do professionals set up an entire room as a studio to be shot from every angle. Typically they optimize for one specific angle which is what the camera sees.
Focus on these items…
– One strong camera angle, get it right and nothing else will matter.
– Curated backgrounds, intentional objects instead of filling shelves with random clutter.
– Using deliberate object placement in the foreground, midground, and background to highlight separation and depth.
– Hiding acoustic room treatment inside of set decoration and design.
Who says you have to spend $1,000,000 on a dedicated studio for Live Streaming or Podcasting to get that professional “Studio Look”?
Getting that convincing “Studio Look” is just a matter of a highly controlled and intentional visual illusion contained within your camera's “Field of View”.
Remember this…
The camera does not see your room, it sees what you show it.
If you are just starting down the Live Streaming/Podcast path,
Let's talk and see if I can help you navigate through it all.
Until the next installment...
⬇⬇⬇
Stay Connected with News, Updates and Offers from
Live Stream Consultants LLC
Join the Streaminati Mailing List now.
We hate SPAM. We will never sell your information, for any reason.
